FAQs for Troubleshooting errors with Excel Add-in
If you experience issues with Oracle Autonomous Database for Excel, refer to frequently asked questions in this section to identify and resolve issues.
- Why is the My Add-ins icon from the Insert ribbon in the MS Excel workbook greyed out?
Even before installing the Excel add-in, sometimes the My Add-ins icon from the Insert ribbon in the MS Excel workbook appears greyed out.
- From the File menu in the Excel ribbon, go to Account and select Manage Settings from the Account page.
- Ensure that you select the Turn on optional connected experiences.
- From the File menu in the Excel ribbon, go to Options and select the Trust Center option from Excel Options.
- Click Trust Center Settings and ensure that deselect Disable all Application Add-ins (if selected) from the Add-ins tab in the Trust Center dialog box.
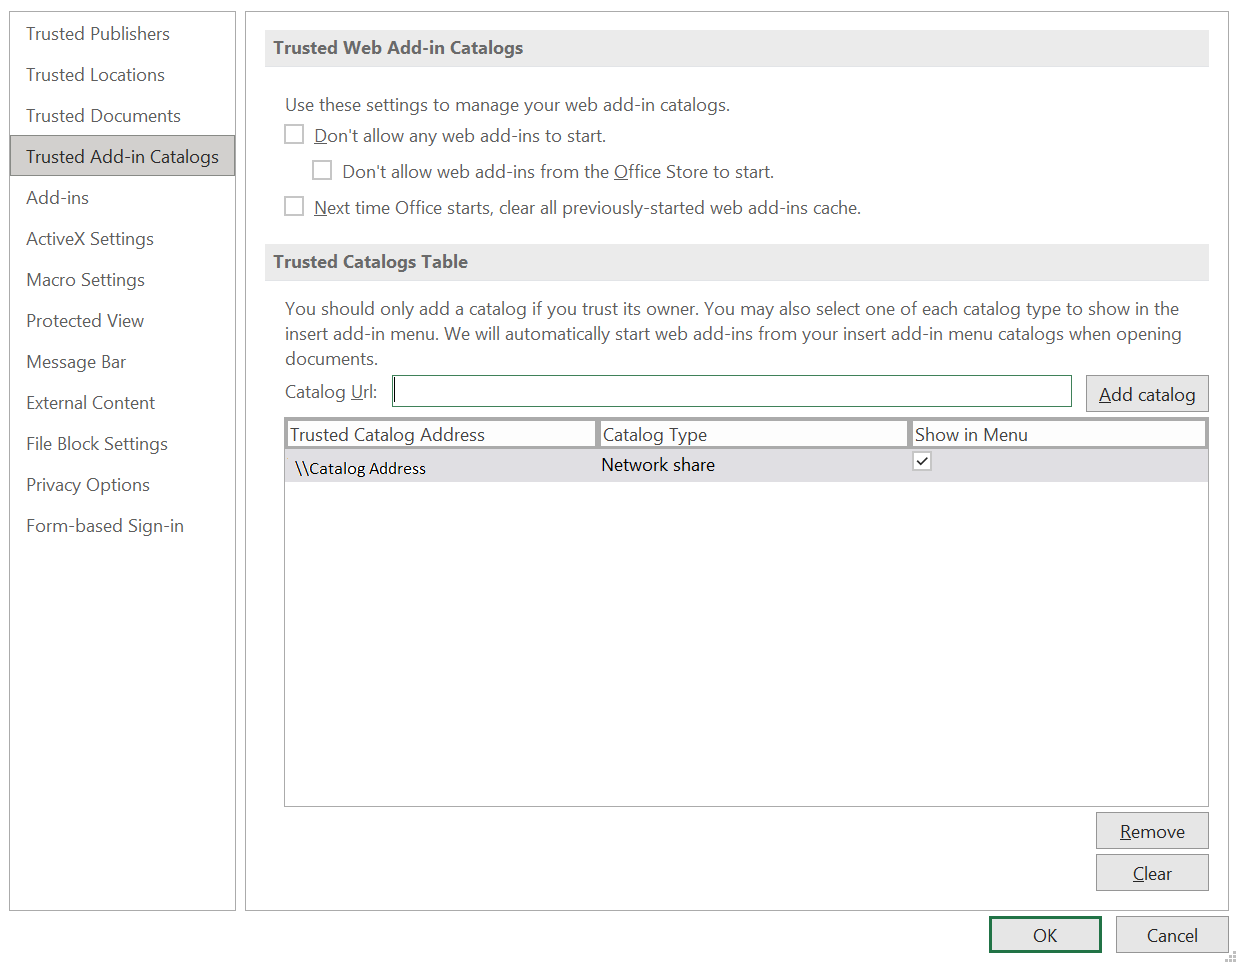
- Select the Trusted Add-in Catalogs menu from the Trust Center dialog box and ensure that you deselect the Don’t Allow any web add-ins to start checkbox.
- Why doesn’t the sign-in page of the Excel Add-in load or appear?
Sometimes you might encounter issues with the Excel Add-in even after loading it correctly. For example, an add-in fails to load or is inaccessible. Check the compatibility version of Excel and the operating system you use.
If the compatibility is correct and the sign-in page to the Excel Add-in still does not show up, or does not load properly, we recommend applying all pending Windows, Office, and browser updates.
- Select Settings, Update & Security, and then Windows Update from the Windows Start menu.
- If updates are available on the Windows Update page, review the updates and click Install Now.
Note
The details of applying Windows updates can vary from version to version and if required, check with your system administrator for assistance.
- Why doesn’t the add-in work correctly after re-installing?
Configure the Excel trusted Add-in catalog to set the add-in correctly after re-installation.
To configure the Excel add-in, check or remove the add-in if it is pointing at the wrong location in the Trusted catalog address. This address should be the same as the shared manifest folder's location (share path).
Click Excel’s File> More> Options>Trust Center >Trust Center Settings> Trusted Add-in Catalogs
Checking is only required the first time you use the installer, or if the shared manifest folder is changed. The change occurs during uninstalling and re-pointing to a new ADB.
To remove the catalog from the trusted table and add a new catalog pointing to a different address:- Select the Catalog you want to remove from the trusted catalog table and click Remove.
- Enter the correct share path of the shared manifest folder in the Catalog URL field and click Add Catalog to add the shared folder to the trusted catalog.
Restart Excel to make the new shared folder active to access the add-in.
- Why doesn’t the add-in work correctly even after configuring the Excel trusted Add-in catalog?
Let’s say you configure the Excel trusted add-in catalog after re-installing the add-in but, it does not load correctly. Sometimes the database server changes are not reflected in Excel even after you set the share path of the shared manifest folder as a trusted add-in catalog. Clear the Office cache to resolve this issue.
Refer to this page: https://docs.microsoft.com/en-us/office/dev/add-ins/testing/clear-cache#clear-the-office-cache-on-windows to clear the Office cache on Windows and Mac.
Clearing the Office cache unloads the Excel add-in. Install the add-in and check the configuration of the Excel trusted add-in catalog. This should solve the issue of the Excel add-in needing to be correctly loaded.
- What should you do if you cannot view My Add-ins icon from the Excel ribbon?
After installing the add-in once, if you cannot view the My Add-ins icon from the Insert ribbon and instead you view the Add-ins icon

Description of the illustration add-ins-icon.png.Follow these instructions:-
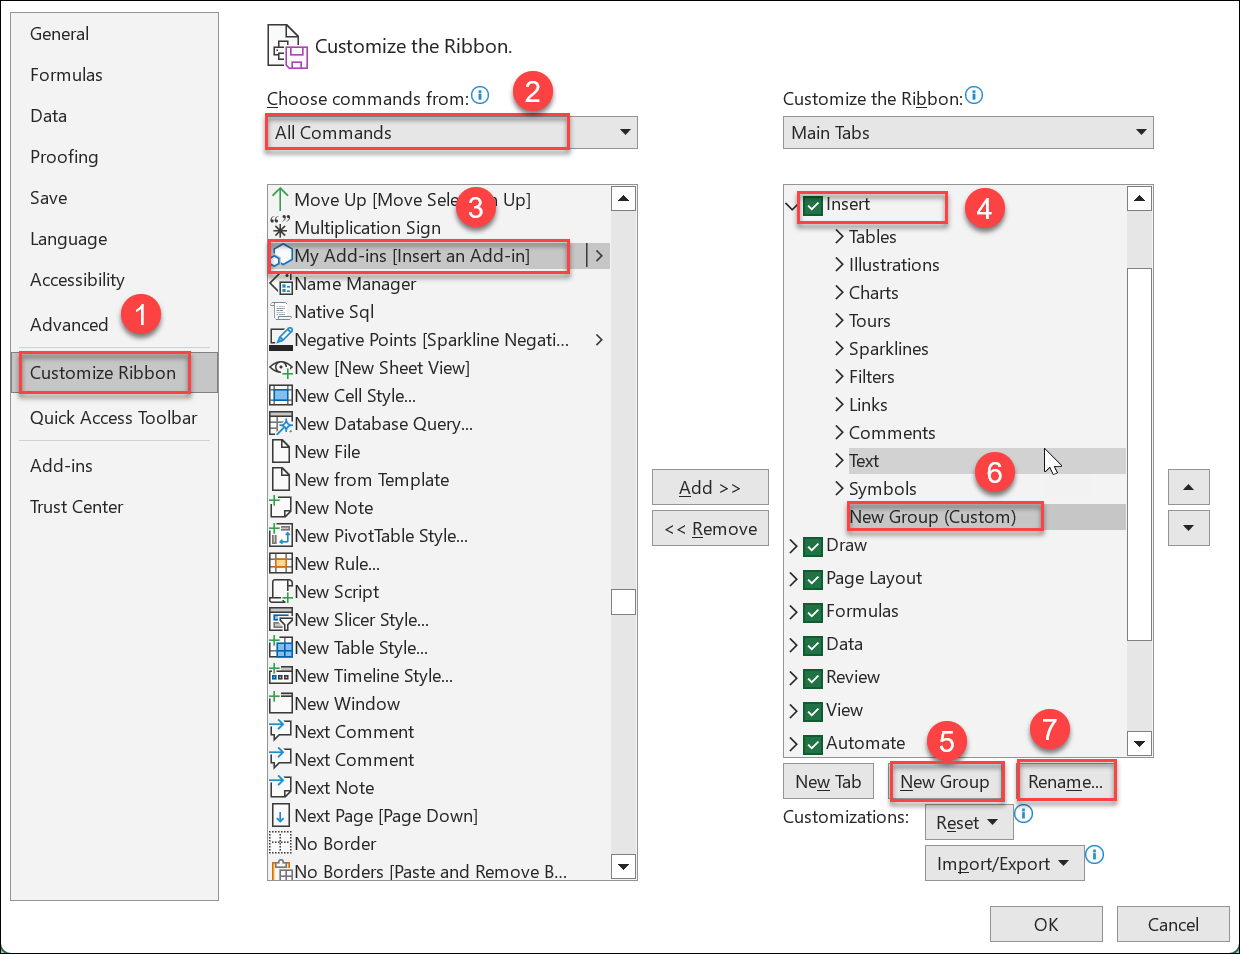
From the File menu in the Excel ribbon, go to Options and select the Customize Ribbon option from Excel Options.
-
Select All Commands drop-down from the Choose commands from drop-down.
-
Click My Add-ins and click Insert option from the Main Tabs list.
-
Click New Group to add a new menu item under the Insert menu. You will view a New Group (Custom) menu option added to the Insert menu.
- Click Rename to rename the newly created menu.
- Specify the name of the add-in. For example, My Addin. Click OK.
-
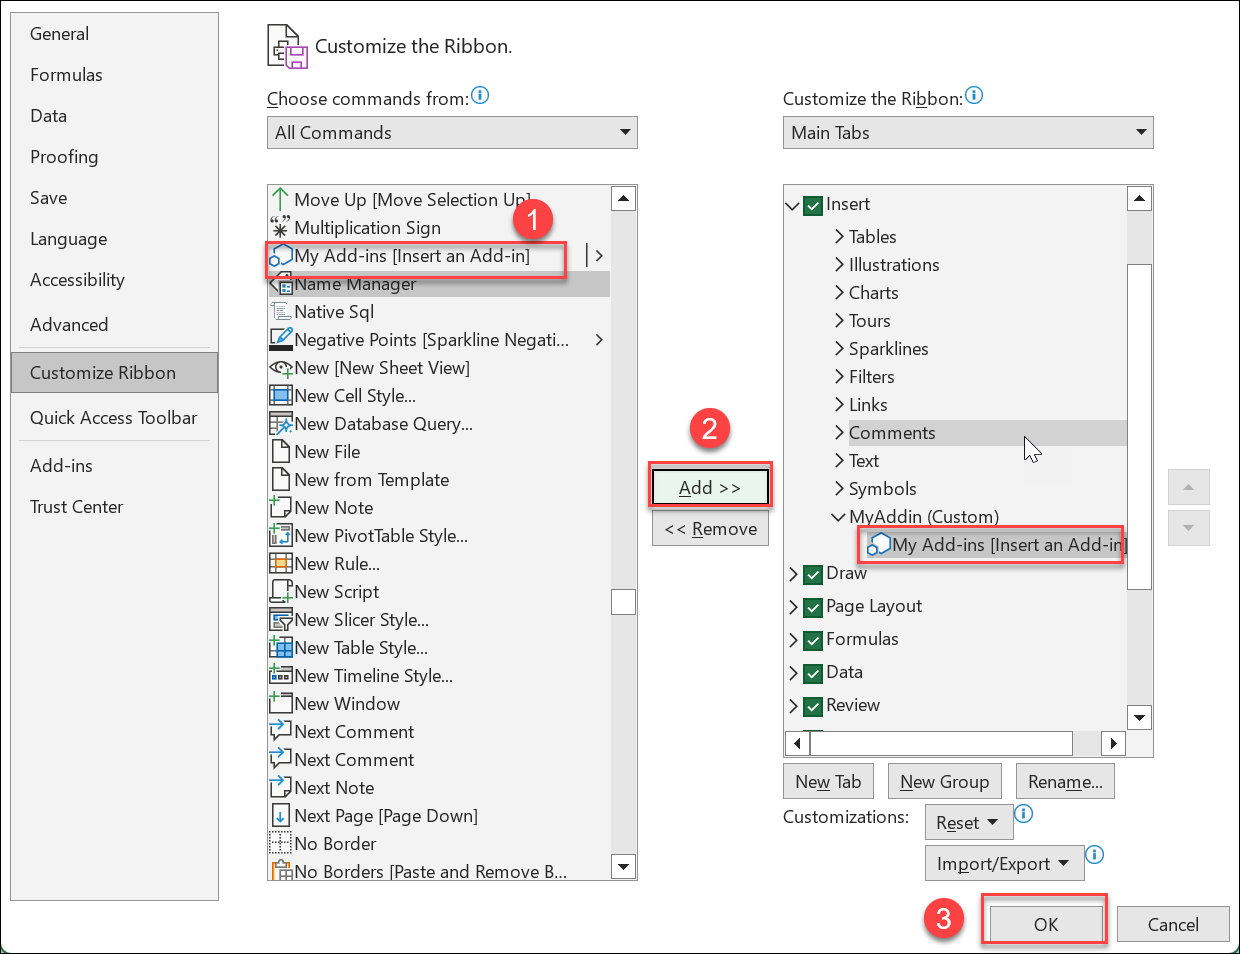
Click My Add-ins[Insert and Add-in] from All Commands list and select Add. My Add-ins menu is added to the newly created menu “MyAddin”.
- Click OK to save the changes.
- Clicking OK takes you to the main Excel sheet page where you can view “MyAdd-ins” menu under the Insert menu.
- Click My Add-ins. You can now view the Oracle Autonomous Database for Excel loaded.
-
- What happens when you cannot view the latest added menu items in the Oracle Autonomous Database for Excel add-in?
Sometimes when you cannot view the changes updated in the latest version of the plug-in, you must:
- Select My Add-ins from the Insert menu on the Excel ribbon.
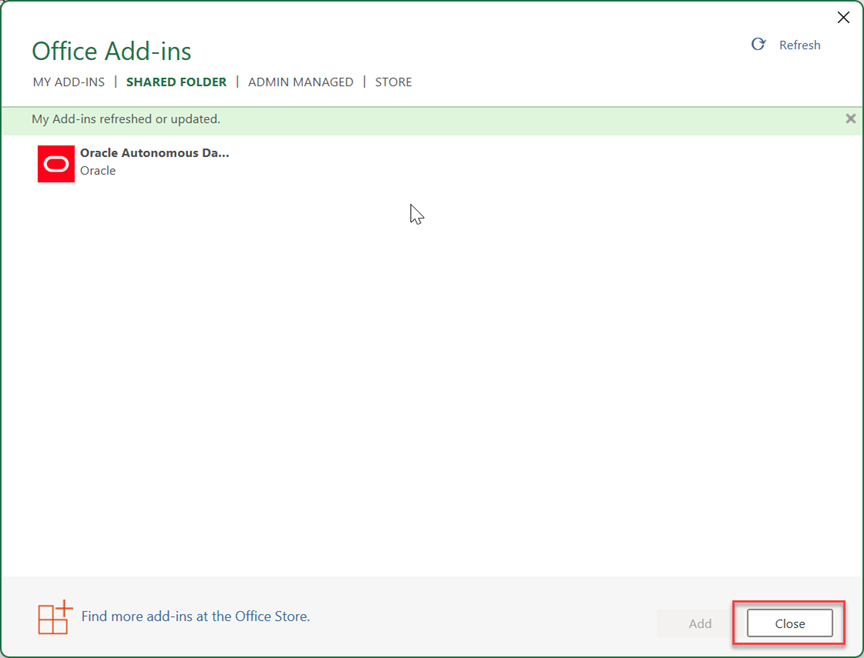
- Click the Shared Folder tab of the Office Add-ins dialog box. You will see the add-in under the Shared Folder list.
- Click Refresh.
After the add-ins are refreshed, you will receive a notification on the dialog that says “My Add-ins refreshed or updated”. The refresh button loads the manifest file again for the latest changes to appear.
- Click Close to close the dialog box.
Parent topic: Oracle Autonomous Database for Excel


