SSO With OCI and Okta
In this tutorial, you set up Single Sign-On between OCI and Okta, where Okta acts as the identity provider (IdP) and OCI IAM is service provider (SP).
This 15 minute tutorial shows you how to set up Okta as an IdP, with OCI IAM acting as SP. By setting up federation between Okta and OCI IAM, you enable users' access to services and applications in OCI IAM using user credentials that Okta authenticates.
- First, gather the information needed from OCI IAM.
- Configure Okta as an IdP for OCI IAM.
- Configure OCI IAM so Okta acts as IdP.
- Create IdP policies in OCI IAM.
- Test that federated authentication works between OCI IAM and Okta.
To perform either of these tutorials, you must have the following:
-
A paid Oracle Cloud Infrastructure (OCI) account, or an OCI trial account. See Oracle Cloud Infrastructure Free Tier.
- Identity domain administrator role for the OCI IAM identity domain. See Understanding Administrator Roles.
- An Okta account with administrator privileges to configure provisioning.
You gather the additional information you need from the steps of each tutorial:
- Get the OCI IdP metadata and the signing certificate for the identity domain.
- Get the identity domain's signing certificate.
You need the IdP SAML metadata from your OCI IAM identity domain to import into the Okta application you create. OCI IAM provides a direct URL to download the metadata of the identity domain you are using. Okta uses the OCI domain URL to connect to OCI IAM.
-
Open a supported browser and enter the Console URL:
- Enter your Cloud Account Name, also referred to as your tenancy name, and select Next.
- Select the identity domain to sign in to. This is the identity domain that is used to configure SSO, for example
Default. - Sign in with your username and password.
- Open the navigation menu and select Identity & Security. Under Identity, select Domains.
- Select the name of the identity domain that you want to work in. You might need to change the compartment to find the domain that you want. Then, click Security and then Identity providers.
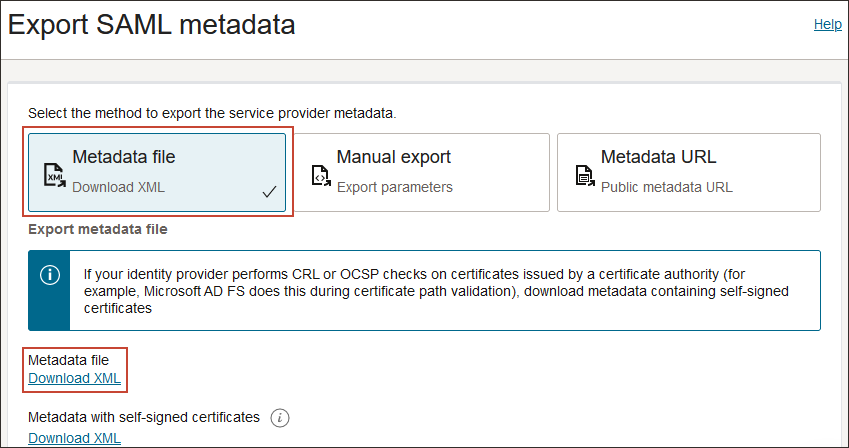
- Select Export SAML metadata.
- Select the Metadata file option, and select Download XML.
- Rename the downloaded XML file to
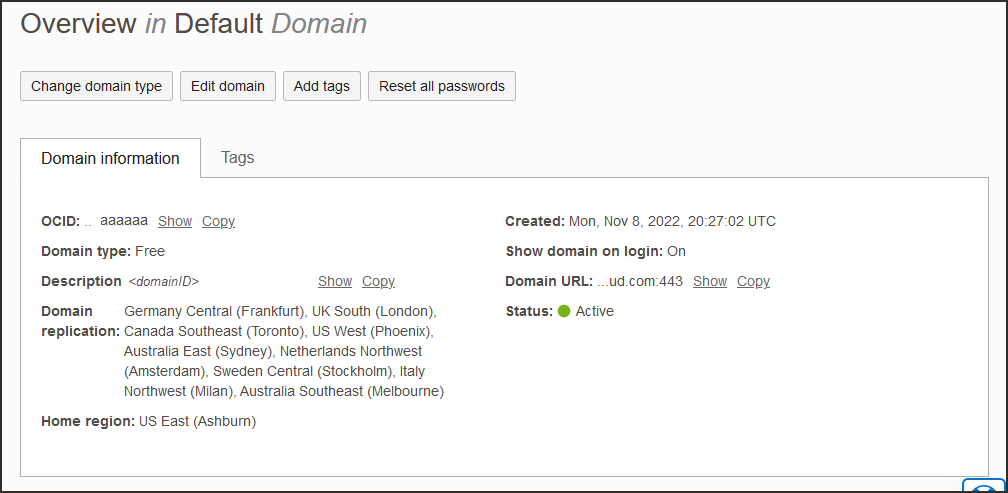
OCIMetadata.xml. - Return to the identity domain overview by selecting the identity domain name in the breadcrumb navigation trail. Select Copy next to the Domain URL in Domain information and save the URL. This is the OCI IAM domain URL which you will use later.
Create an app in Okta, and make a note of values you'll need later.
- In the browser, sign in to Okta using the URL:
https://<OktaOrg>-admin.okta.comwhere
<OktaOrg>is the prefix for your organization with Okta. - In the left menu, select Security and choose Applications and then select Browse App Catalog.
- Search for
Oracle Cloudand select Oracle Cloud Infrastructure IAM from the options available. - Select Add Integration.
- Under General settings, enter a name for the application, for example
OCI IAM, and select Done. - In the application details page for your new application, select the Sign On tab, and under SAML Signing Certificates select View SAML setup instructions.
- On the View SAML setup instructions page, make a note of the following:
- Entity ID
- SingleLogoutService URL
- SingleSignOnService URL
- Download and save the certificate, with a file extension of
.pem.
Create an IdP for Okta on the OCI Console.
- In the OCI Console in the domain you are working in, select Security and then Identity providers.
- Select Add IdP, then select Add SAML IdP.
- Enter a name for the SAML IdP, for example
Okta. Select Next. - On the Exchange metadata page, ensure that Enter IdP metadata is selected.
- Enter the following from step 8 in 2. Create an App in Okta:
- For Identity provider issuer URI: Enter the Enter ID.
- For SSO service URL: Enter the SingleSignOnService URL.
- For SSO service binding: Select
POST. - For Upload identity provider signing certificate: Use the
.pemfile of the Okta certification.
Further down the page, ensure that Enable Global logout is selected, and enter the following.
- For IDP Logout Request URL: Enter the SingleLogoutService URL.
- For IDP Logout Response URL: eEnter tbhe SingleLogoutService URL.
- Ensure that the Logout binding is set to POST.
- Select Next.
- On the Map attributes page:
- For Requested NameId format, choose
Email address. - For Identity provider user attribute: Choose SAML assertion Name ID.
- For Identity Domain user attribute: Choose Primary email address.
- For Requested NameId format, choose
- Select Next.
- Review, and select Create IDP.
- On the What's Next page, select Activate, then select Add to IdP policy.
- Select Default Identity Provider Policy to open it, then select the for the rule and select Edit IdP rule.
- Select in Assign identity providers and then select Okta to add it to the list.
- Select Save changes.
- Download the SP Certificate:
- In the OCI Console in the domain you are working in, select Security and then Identity providers.
- Select Okta.
- On the Okta IdP page, select Service Provider metadata.
- Select Download next to Service Provider signing certificate to download the SP signing certificate and save it.
- In the Okta console, select Application then select the new application
OCI IAM. - Go to the Sign On tab and select Edit.
- Select Enable Single Logout.
- Browse to the certificate you downloaded from the OCI IAM Console in the previous step, and select Upload.
- Scroll down to Advance Sign-on Settings.
- Enter the following:
- Oracle Cloud Infrastructure IAM GUID: Enter the OCI IAM domain URL from step 10 in 1. Get the OCI Identity Provider Metadata and the Domain URL.
- Set the Application username format to
Email.
- Select Save.
- Go to the Assignments tab and assign users who you want to have access to this application.
- Select Next.
-
Enter the Console URL:
- Enter your Cloud Account Name, also referred to as your tenancy name, and select Next.
- Sign in with your username and password.
- Select the domain that you configured Okta IdP for.
- On the sign-in page, select the Okta icon.
- Enter your Okta credentials. You are signed in to the OCI Console.
Congratulations! You have successfully set up an SSO between Okta and OCI IAM in two different ways.
To explore more information about development with Oracle products, check out these sites:


