Publish Listings to Marketplace
As a producer, create and configure listings, then submit them for publishing to make your tables available in the Marketplace.
Prerequisites
ADMIN user to publish datasets for a given region:BEGIN
DBMS_CLOUD_LINK_ADMIN.GRANT_REGISTER( username =>’USER_NAME’, scope => 'MY$REGION');
END;If you do not run the above command, the tool will raise an exception.
This topic describes how to publish listings to the Marketplace.
- On the Data Marketplace page, select +Publish Table. You can view a Publish Table to Marketplace wizard.
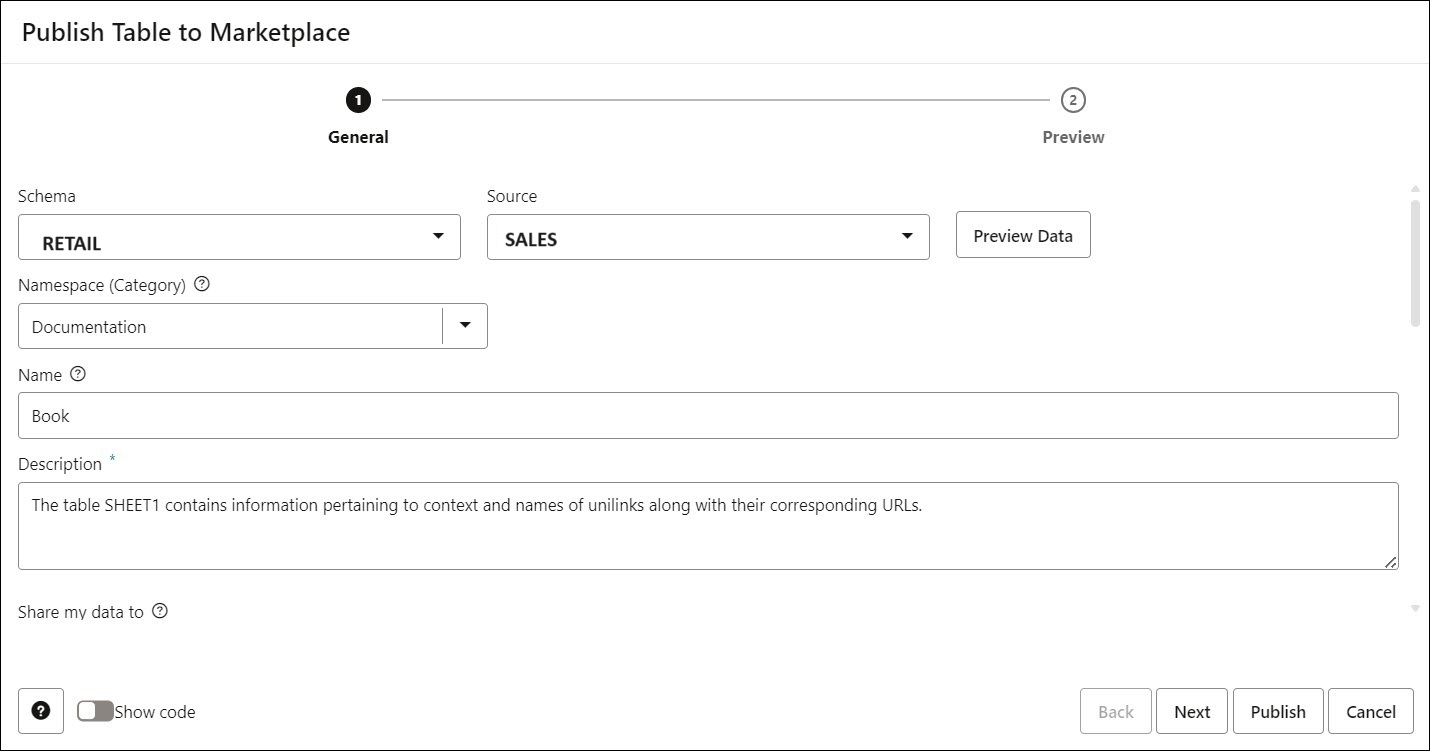
- On the General tab, specify the following details:
- Schema: Select the schema from the drop-down. For example, RETAIL.
- Source: You can view the source tables you load in the Autonomous AI Database using the Data Load tool. For example, SALES.
Note
Note: If you have not loaded a table, the drop-down will be empty and the option will be greyed out. Make sure you have source data.Click Preview Data to view the preview of the loaded table. You can also view the statistics of the table.
See View Statistics of Data Entities for more information. - Namespace: Specify the category of the data set you wish to group your data sets under. For example, Documentation.
- Name: Specify the name of the dataset. This should fall under the Namespace category. For example, Book.
- Description: This field is Auto filled using the AI capabilities of the Marketplace feature. It displays the description of the dataset shared in the listing. The description helps consumers understand the content of your dataset.
Note
- You can view the auto filled description only after you have configured and set AI profile using the Use DBMS_CLOUD_AI to Configure AI Profiles procedure.
- After you have configured and set your AI profile, you must set the Data Studio Settings wizard on the Connections page.
-
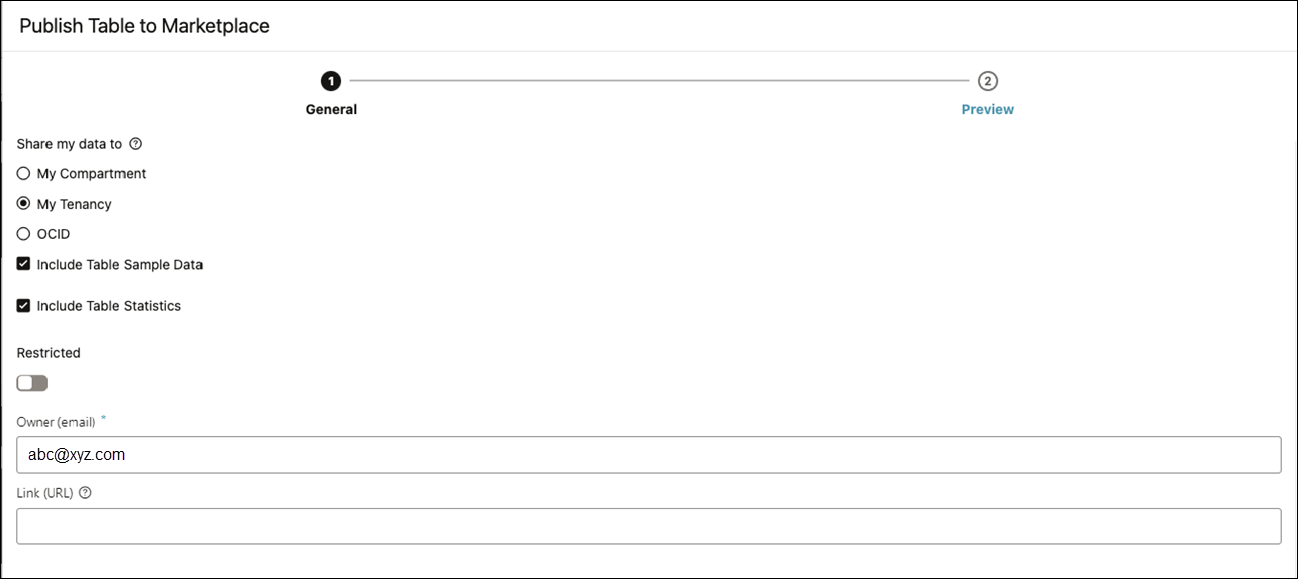
Share my data to: Specifies who and from where you are allowed to access the registered table.
You can choose from any of the following available options:
-
MY TENANCY: You can grant remote data access to any resource, tenancy, compartment, or database in the tenancy of the Autonomous AI Database instance that is registering the data set.
-
MY COMPARTMENT: You can grant remote data access to any resource, compartment, or database in the compartment of the Autonomous AI Database instance that is registering the data set.
-
OCID: Access to the data set is allowed for the specific Autonomous AI Database instances identified by OCID.
Note
Follow the steps provided in GET SHARING ID to obtain the OCID. It is alternatively known asSHARING_ID.You can also include to share the Sample Data and Statistics of the table you select.
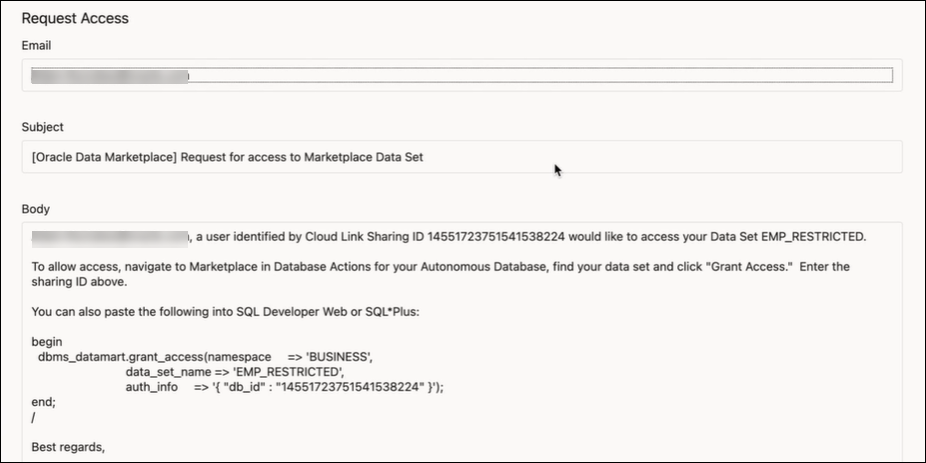
Restricted: When you publish a listing as restricted, the producer will receive an email notification with the Database ID for your listing.
The producer shall grant access to the dataset for the consumer to consume the dataset by specifying the Database ID shared in the email.
-
- Owner (email): Specify the email address of the producer, for example, abc@xyz.com.
- Link (URL): Specify a URL that you can browse to discover more details on the data the provider shares. This field is optional.
- Tags: In the Tags text box, enter the tags of your choice. You can use tags to filter the Datasets on the search field.
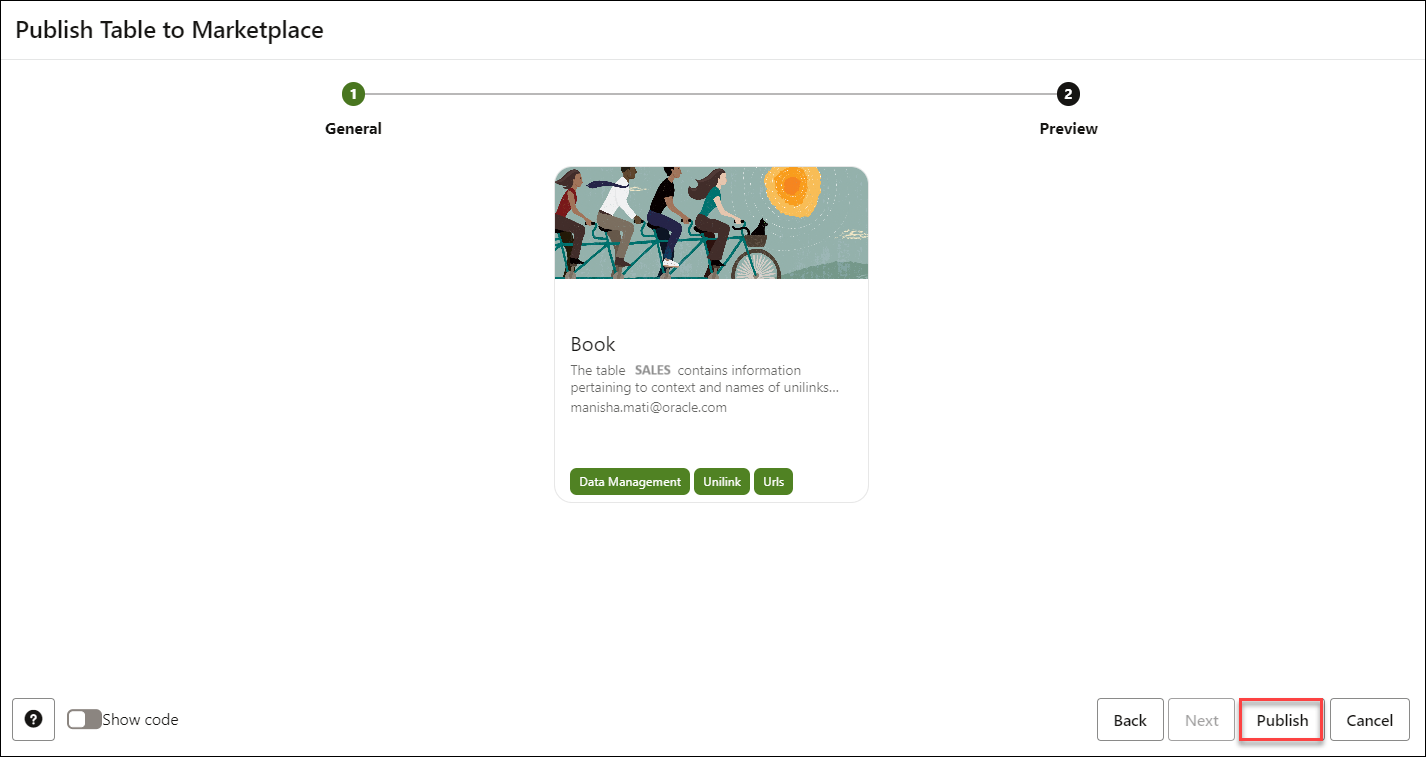
- Click Next to progress to the Preview tab. The preview tab displays the preview of the dataset card that will be displayed as a result of this publish.
-
Click Publish to publish the table to the Marketplace.
You can view the published dataset in the My Published Dataset tab of the Data Marketplace page.
Parent topic: The Data Marketplace Tool


